
Getting Started with P1
In this guide, we’ll walk through creating a brand new P1 site on Pantheon. Follow this guide in order:
- Set up a Pantheon Content Account
- Create a Next.js Site With Our Starter Kit
- Create a P1 site in the Content Dashboard
- Set next.js Site Secrets
- Deploy to a Dev Site on Pantheon.io
Set up a Pantheon Content Account
- Sign up for a P1 account at https://content.pantheon.io. (Get in touch with us; at this time, it is a private release, and we will need to manually provision access for you).
Create a Next.js Site With Our Starter Kit
Before you start, you need:
- Node.js 24 or newer
- pnpm, npm, or yarn
- git, if you want the scaffolder to create a repository with an initial commit
- On your local environment, initialize a site using our SDK starter:
pnpm create @pantheon-systems/p1-starter-kit- Answer the option questions from the CLI. For these instructions, choose pnpm if you have it installed.
- Ensure pnpm install (or npm install) executes locally
- Commit and push to your GitHub repository
Create a P1 site in the Content Dashboard
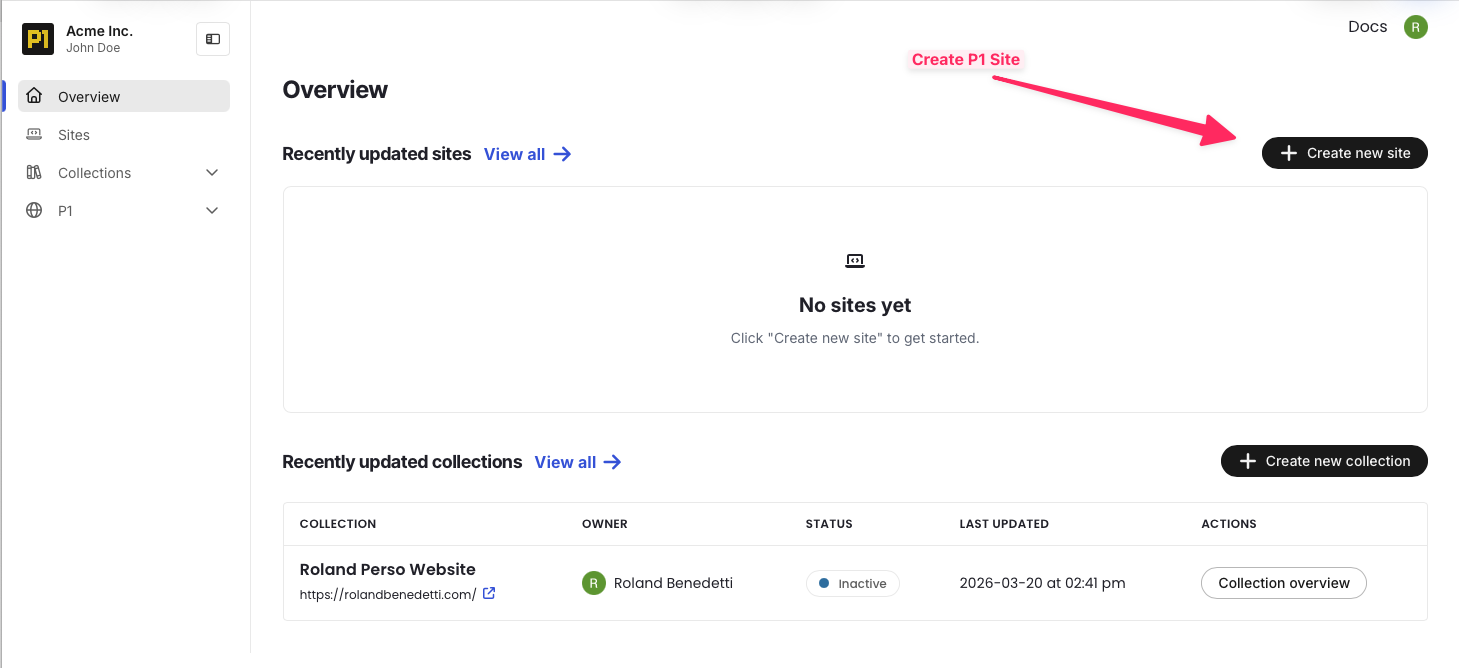
- Create your site in P1 dashboard (https://content.pantheon.io)
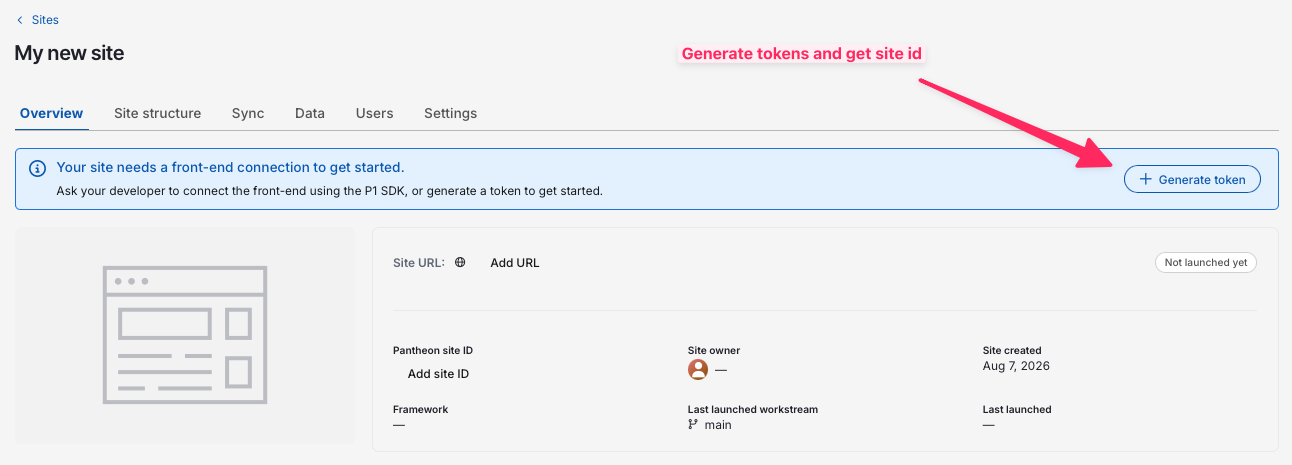
- Once the P1 content site is created, generate a token and get your ID
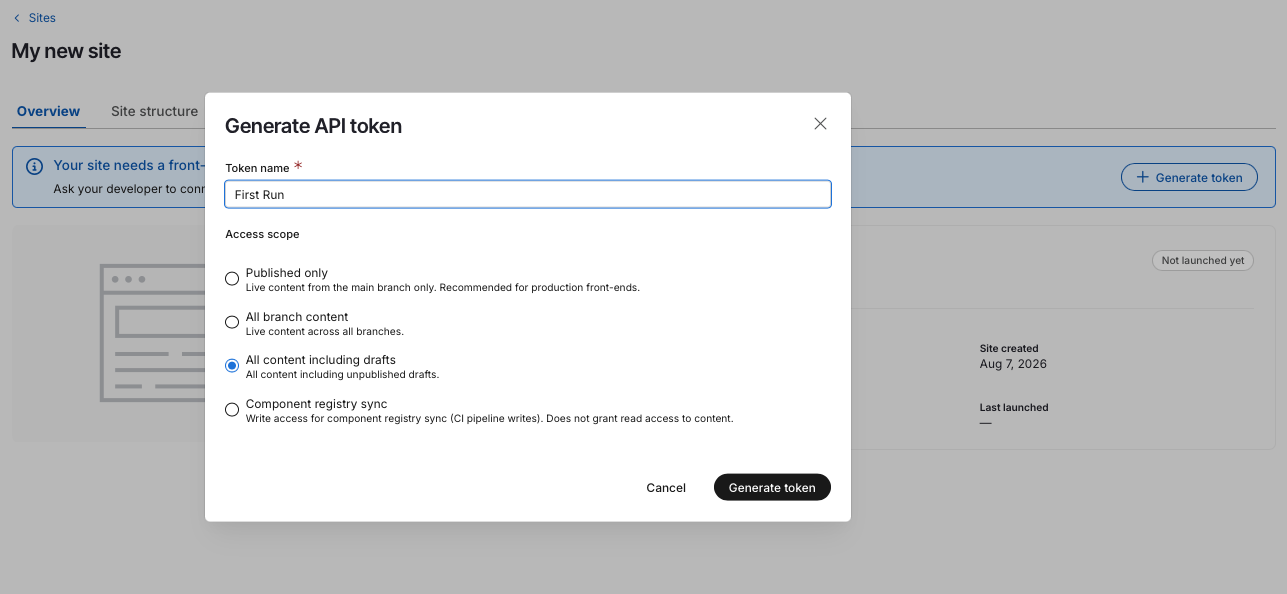
Choose the scope you want for that first token, typically “All content included draft” for a first use.
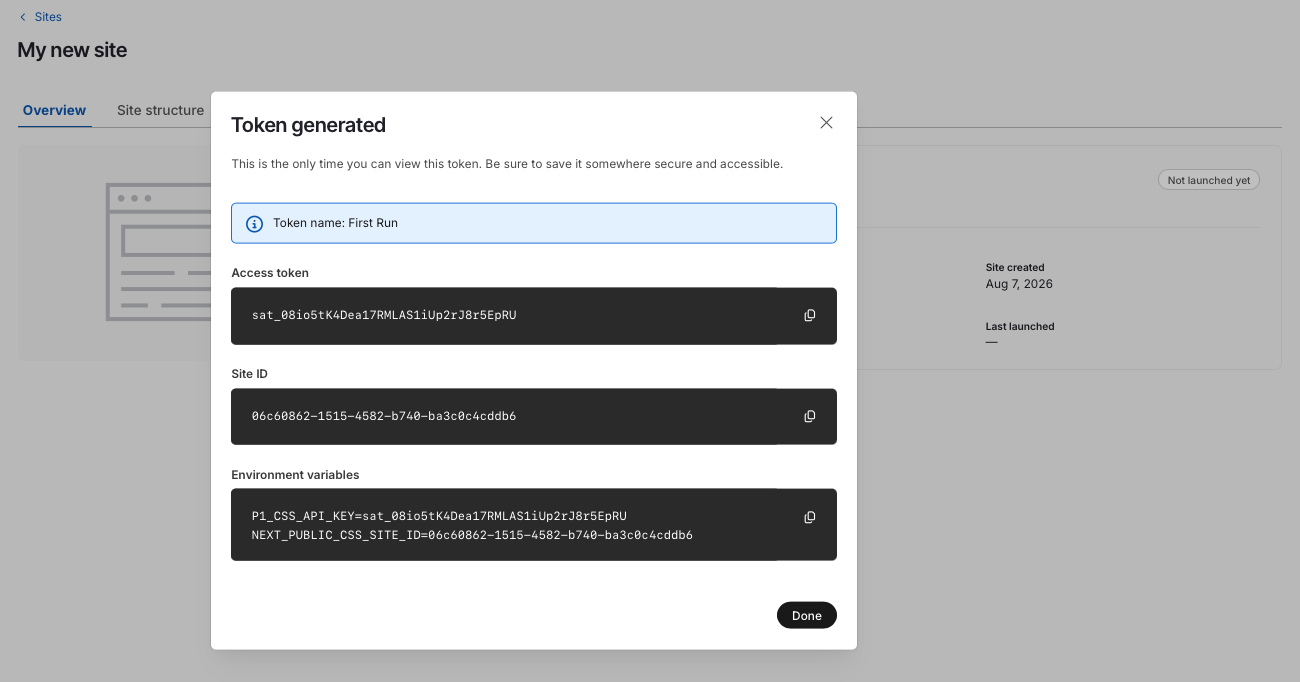
- The token will only be shown once; save it to personal secrets or in a secure temporary place, or keep the modal open
Set Next.js Site Secrets
- Set these secrets on your Pantheon Next.js site. Your localhost .env can omit the “P1_SITE_URL” (which serves as a redirect location after authentication)
NEXT_PUBLIC_CSS_SITE_ID=your-site-id-from-popup-above
CSS_API_KEY=your-token-from-popup-above
P1_SITE_URL=your-site-url-once-you-have-it-you-can-start-without-for-local-development- Check that the site is executing well on localhost by running pnpm run dev
- In particular, test connectivity with the P1 back end by visiting the editor page, appending /p1 to your site URL
Deploy to a Dev Site on Pantheon.io
- Push the codebase of your site created above to a GitHub repository
- Go to Pantheon.io dashboard to create your hosted Next.js site
- Create a Next.js site
- When creating that site, choose “from an existing repository” and pick the repository created above
- When asked for secrets, paste the secrets above. For P1_SITE_URL, the url should be https://dev-yoursitename.pantheonsite.io
- Deploy
At this stage, you should be able to test end-to-end P1 with a hosted site on Pantheon.
From there, you can deploy to a test or live environment if you wish, following our Next.js documentation. A live environment is required for any production use, especially to set your own domain name.